🧰 Tools & Gear You’ll Need
- String bistro lights (LED recommended for energy efficiency and durability)
- Heavy-duty outdoor extension cords
- Gaffer tape or zip ties for securing cords
- Measuring tape
- Step ladder or A-frame ladder (ensure stability)
- Command hooks or outdoor-rated adhesive hooks (for temporary mounting on smooth surfaces)
- S-hooks or carabiners (for attaching lights to existing structures)
- Weatherproof junction boxes or power strips (if multiple connections are needed)
- Dusk-to-dawn sensor or timer (optional, for automated on/off)
- Wire cutters/strippers (if custom cord length is needed, use with caution)
- Gloves and safety glasses
Why Warm String Bistro Lights are Essential for Evening Wedding Receptions
The transition from dusk to darkness at an outdoor wedding reception is a magical time, but it requires thoughtful illumination. Relying solely on venue-provided floodlights or bare bulbs can result in a harsh, uninviting atmosphere that detracts from the romance and celebration. Warm string bistro lights, with their gentle glow and classic aesthetic, have become the go-to solution for wedding planners and couples seeking to create an enchanting evening ambiance. They are not merely functional; they are a critical design element that transforms a plain outdoor space into a captivating event venue.
Setting the Ambiance: Beyond Basic Illumination
The primary function of lighting at any event is to allow guests to see, but for a wedding reception, it’s about much more than visibility. Warm string bistro lights excel at setting a specific mood – one of romance, celebration, and cozy intimacy. The warm color temperature (typically around 2700K) mimics the soft glow of candlelight, creating a visually soothing environment that encourages guests to relax and mingle. This is a stark contrast to cooler, brighter lights that can feel sterile and uninviting for a celebratory evening affair.
Enhancing Guest Experience and Photo Opportunities
Thoughtful lighting significantly impacts the guest experience. It guides movement, defines different areas of the reception (like the dance floor or dining tables), and makes the overall environment more comfortable. Critically, well-executed bistro lighting creates stunning photo opportunities. The warm, diffused light is incredibly flattering for portraits, toasts, and candid moments. It eliminates the harsh shadows often cast by direct lighting and adds a beautiful bokeh effect to the background of photographs, making your wedding memories even more visually appealing.
The Romantic Appeal of Bistro Lights
There’s an undeniable romantic allure to bistro lights. Their design harkens back to charming European cafes and intimate gatherings, lending an air of timeless elegance to any wedding. When strung overhead, they create a “ceiling” of light that draws the eye upward and makes the space feel more enclosed and intimate, even in a vast outdoor setting. This creates a magical canopy effect that is both visually striking and deeply romantic, perfect for dancing the night away or sharing quiet conversations.
Planning Your Bistro Light Setup: Key Considerations for 2026
Before you even think about plugging anything in, meticulous planning is crucial. A successful bistro light installation involves understanding your venue, calculating your needs, and selecting the right equipment. Rushing this phase is a common pitfall that leads to inadequate lighting, safety hazards, or unexpected costs.
Assessing Your Venue: Space, Power, and Structures
Every venue is different. You need to assess the physical layout: Where are the trees, poles, pergolas, or other structures you can use for mounting? Are there any existing electrical outlets, and are they sufficient for your lighting needs? Understanding the venue’s limitations and possibilities is the first step. For instance, a venue with beautiful mature trees offers natural anchor points, while an open field might require renting poles or utilizing tent structures. Note down the dimensions of the areas you want to illuminate.
Venue Walk-Through & Power Audit
Conduct a thorough site visit with your venue coordinator or a lighting professional. Identify all potential mounting points (trees, poles, buildings, fences). Locate all available power sources and assess their capacity. Understand any venue restrictions on what can be attached to structures or where power can be drawn from.
Calculating the Number of Strands Needed
Over- or under-lighting can both ruin the ambiance. Measure the length and width of the areas you intend to cover. Most bistro light strands come in standard lengths (e.g., 25, 50, or 100 feet). Calculate how many strands you’ll need to achieve your desired coverage. Remember to account for the “sag” in the wires – they won’t be perfectly taut. A general rule of thumb is to add about 10-15% extra length for sag and potential adjustments. For denser coverage over a specific area, you might need to run strands parallel or in a crisscross pattern.
Choosing the Right Type of Bistro Lights (LED vs. Incandescent, Bulb Style)
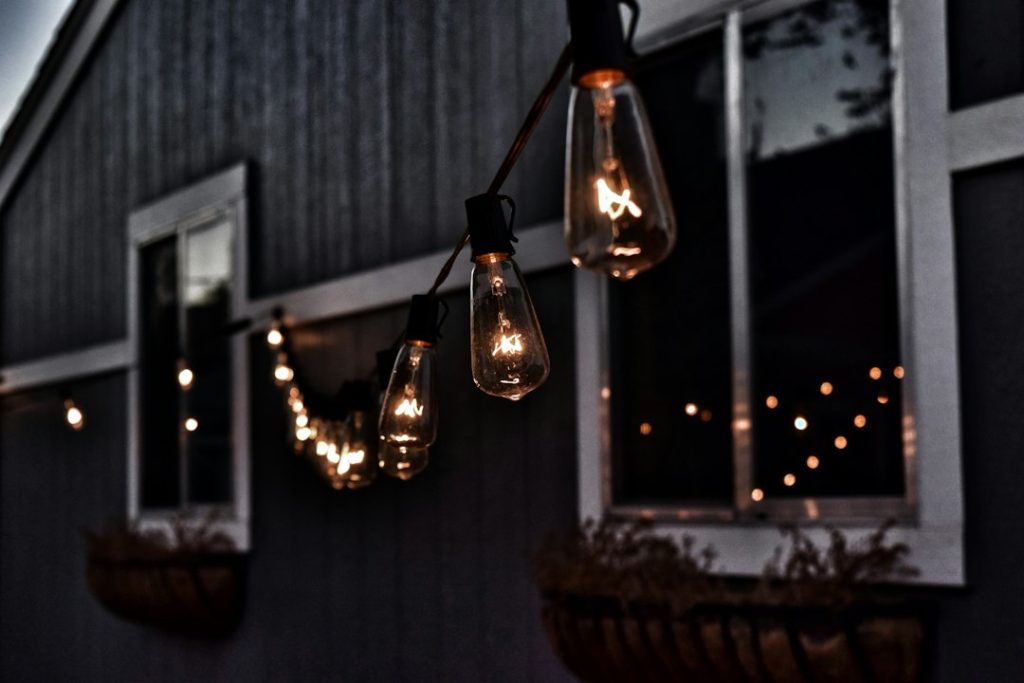
For 2026, LED bistro lights are the overwhelmingly superior choice. While incandescent bulbs offer a classic look, they consume significantly more energy, generate substantial heat, and are much more fragile. LEDs are energy-efficient (reducing power draw and the need for heavy-duty electrical infrastructure), cooler to the touch (a safety benefit), last much longer, and are far more durable. Look for LEDs with a warm white color temperature (2700K) to achieve that desired romantic glow. Bulb styles vary – Edison-style exposed filaments, classic round bulbs, or smaller C7/C9 style bulbs – choose based on your aesthetic preference and the scale of your venue.
Understanding Power Requirements and Extension Cord Needs
This is where many DIY setups fail. LEDs are energy-efficient, but stringing hundreds or thousands of bulbs together can still draw a significant amount of power. Calculate the total wattage of your lights (number of bulbs per strand x wattage per bulb x number of strands). Ensure your power source (venue outlets) can handle the load. Use heavy-duty, outdoor-rated extension cords – thin, indoor cords are a fire hazard and can cause voltage drop, leading to dim lights. Plan the placement of your extension cords and power sources strategically to minimize trip hazards.
Power Calculation & Cord Strategy
For LED bistro lights, each strand typically draws minimal power (often under 50 watts). Multiply this by the number of strands. A standard 15-amp circuit can safely handle around 1500-1800 watts (continuous load). Use outdoor-rated, 12-gauge or 14-gauge extension cords for runs longer than 25 feet. Avoid daisy-chaining too many extension cords together. Plan the shortest, safest routes for cords from power sources to your lighting areas.
Strategic Placement: Maximizing Visual Impact
Where you hang your lights is as important as the lights themselves. Strategic placement turns functional lighting into a work of art, enhancing the venue’s features and guiding guests through the space.
Creating Zones: Dance Floor, Dining Areas, and Lounges
Use bistro lights to define different functional zones within your reception area. Hang strands more densely or at a lower height over the dance floor to create a focal point and a sense of energy. In dining areas, softer, more spread-out lighting can create an intimate atmosphere for conversation. For lounge areas, consider draping lights around seating arrangements or over cocktail tables to make them feel cozy and inviting.
Overhead Canopy and String Lighting Patterns
The classic overhead canopy effect is achieved by running strands from a central point outwards, or in a grid pattern across the entire space. Think of a zigzag, crisscross, or concentric circle pattern. These patterns create a visually stunning “ceiling” of light. Consider the overall impact – do you want a uniform glow or more dramatic highlights? The pattern should complement, not compete with, other decor elements.

Pathway and Entrance Lighting for Warm Welcome
Don’t forget the arrival experience! Use bistro lights to clearly mark pathways from parking areas to the reception entrance, and to illuminate the main entrance itself. This provides a warm, inviting first impression and ensures guests can navigate safely in the dark. Consider lining walkways with lights or hanging strands over the entrance archway.
Incorporating Lights with Natural Elements (Trees, Arbors)
Leverage the existing beauty of your venue. Drape lights artfully around tree trunks and branches to highlight their natural form. Wrap lights around arbors or archways that serve as focal points for the ceremony or reception. This integration makes the lighting feel organic and enhances the natural beauty of the outdoor setting, rather than feeling like an artificial add-on.
Strategic Zone & Pathway Illumination
Map out your reception zones (dance floor, dining, bars, lounge areas) and walkways. Plan specific light placement for each zone to achieve the desired ambiance – denser for the dance floor, softer for dining. Use lights to clearly define entrances and pathways, ensuring safety and creating an inviting first impression. Integrate lights with natural elements like trees and arbors for a cohesive look.
Installation Best Practices for Safety and Aesthetics
Proper installation is paramount for both safety and the visual appeal of your lighting. Poorly secured lights or haphazardly run cords are not only unsightly but can pose serious trip or fire hazards.
Secure Mounting Techniques to Prevent Accidents
Never rely on flimsy attachments. Use sturdy hooks, zip ties, or carabiners that are rated for the weight of the lights and potential wind load. If mounting to trees, use methods that won’t damage the bark long-term. For structures like pergolas or tent poles, ensure they are stable enough to support the lights. Always test the security of each mounting point before stringing the entire strand.
Managing Wires and Cords: Safety and Appearance
Visible, loose cords are a major safety concern and detract from the aesthetic. Run cords along edges, behind structures, or under carpets/runners where possible. Use gaffer tape (which removes cleanly) or zip ties to secure cords neatly to mounting points. Avoid running cords across high-traffic areas where guests might trip. If cords must cross pathways, elevate them safely or cover them with protective cable ramps.

Weatherproofing Your Lighting for the 2026 Season
Outdoor events are subject to the elements. Ensure your lights, cords, and connections are rated for outdoor use. Look for IP ratings (Ingress Protection) of IP44 or higher for water resistance. Secure connections to prevent moisture from entering. If rain is in the forecast, have a plan for protecting electrical components or consider a backup indoor option if possible. Even dew can be an issue overnight.
Professional Installation vs. DIY: Weighing the Options
While DIY can save money, professional installation offers peace of mind, especially for larger or more complex setups. Professionals have the expertise, equipment, and insurance to handle installations safely and efficiently. They can also advise on optimal placement and ensure all electrical requirements are met. For most couples, the cost of professional installation is a worthwhile investment for safety, aesthetics, and reduced stress.
Safe & Aesthetic Installation Techniques
Utilize secure mounting hardware like heavy-duty hooks and UV-resistant zip ties. Run electrical cords discreetly along edges or behind structures, using gaffer tape or ties to keep them tidy and prevent tripping hazards. Ensure all components are outdoor-rated and weatherproofed. Assess whether professional installation is a better fit for your budget and complexity, prioritizing safety and visual appeal above all.
Troubleshooting Common Bistro Lighting Challenges
Even with the best planning, you might encounter issues. Knowing how to troubleshoot common problems can save the day (or night).
Dealing with Limited Power Sources
If your venue has very few or low-capacity outlets, LEDs are your best friend. You might need to rent a small portable generator or use a power distribution system designed for events. Alternatively, strategically use fewer strands or focus lighting on the most critical areas. Discuss options with your venue or a lighting rental company.
Ensuring Consistent Brightness Across All Strands
Dimming lights across long runs are often due to voltage drop, especially with older or lower-quality wiring. Using thicker gauge extension cords (12-gauge is Best for longer runs) and minimizing the number of connections helps. Ensure all bulbs are screwed in securely. For LED strands, consider those designed for longer runs or with integrated voltage regulation.
Repairing or Replacing Damaged Lights Quickly
Have a few spare bulbs or even a spare strand on hand. If a bulb goes out in an incandescent string, it can sometimes break the circuit. With LEDs, typically only the individual bulb fails, and the rest of the strand stays lit. Keep basic tools handy for quick fixes. If a whole section fails, it might indicate a connection issue or a more significant problem requiring replacement.
Common Lighting Problem Solving
Address limited power by using energy-efficient LEDs, renting generators, or focusing lights strategically. Combat dimming with thick gauge extension cords and secure connections. Keep spare bulbs or strands for quick repairs and have basic tools available to fix minor issues. Test all lighting thoroughly well before guests arrive.
Beyond Bistro Lights: Complementary Lighting Techniques
While bistro lights are the star, they often shine brightest when complemented by other lighting elements that add depth and sophistication.
Uplighting for Architectural Features
Use uplights (lights placed on the ground pointing upwards) to highlight architectural elements of your venue, like columns, textured walls, or large trees. Colored uplighting can add a dramatic flair and tie into your wedding’s color scheme.
Accent Lighting for Centerpieces and Decor
Small spotlights or LED pin-spots can be used to illuminate centerpieces, cake tables, or other specific decor items. This draws attention to these details and ensures they stand out, even in a romantically lit environment.

Sparklers and Other Festive Lighting Elements
For grand exits or celebratory moments, consider sparklers, fairy lights in jars, or even a small, tasteful fireworks display (venue permitting). These add a touch of fun and magic, creating memorable photo opportunities.
Budgeting for Your Outdoor Wedding Reception Lighting in 2026
Lighting can be a significant portion of your decor budget. Understanding the costs involved helps in planning and making informed decisions.
Cost Breakdown: Lights, Installation, and Rentals
Purchasing Lights: Commercial-grade LED bistro light strands can range from $50 to $150 per 50-foot strand, depending on quality and features. You might need 10-20 strands or more.
Rental Costs: Renting lights might seem cheaper upfront, but costs add up. Expect to pay $10-$30 per strand per day, plus potential setup fees.
Professional Installation: This can range from $500 to $3,000+, depending on the complexity, size of the space, and the company’s rates. DIY saves on installation labor but requires purchasing or renting equipment.
Tips for Saving on Lighting Without Compromising Ambiance
Buy Used: Look for used commercial-grade lights after wedding season.
DIY Strategically: Handle the installation yourself in smaller, easily accessible areas, but hire professionals for complex or high areas.
Focus Coverage: Concentrate the most dramatic lighting effects over key areas like the dance floor and main dining spaces, using less intense or fewer lights elsewhere.
Borrow or Rent Wisely: If renting, negotiate package deals or compare prices from multiple vendors. Renting might be more cost-effective than buying if you only need them for one event.
Budget-Conscious Lighting Strategies
Research pricing for purchasing versus renting, factoring in installation costs for both professional and DIY approaches. Explore options like buying used lights, focusing lighting on essential areas, or combining DIY installation with professional help for complex parts. Compare quotes from multiple vendors diligently.
Frequently Asked Questions About Bistro Lighting for Weddings
Q1: How many bistro lights do I need for a 50×50 foot reception area?
A1: This depends on the effect you want. For a full canopy, you might need 15-20 strands of 50-foot lights, possibly run in multiple layers or patterns. For just outlining the perimeter and key areas, you’d need far fewer.
Q2: Can I leave bistro lights up overnight?
A2: If they are rated for outdoor use and properly secured, yes. However, check with your venue regarding any restrictions on leaving installations up past the event end time.
Q3: Are LED bistro lights safe to the touch?
A3: Yes, LED bistro lights generate very little heat, making them safe to touch, which is a significant advantage over incandescent bulbs, especially if guests or children might come into contact with them.
Q4: What’s the difference between commercial-grade and home-use bistro lights?
A4: Commercial-grade lights are built with heavier-duty wiring, more robust sockets, better weatherproofing, and are designed for prolonged use and greater durability, making them ideal for events.

Q5: How far apart should I hang the light strands?
A5: For a canopy effect, strands are often hung 10-20 feet apart, depending on the length of the strands and the desired density of light. Measure your space and plan your pattern accordingly.