🧰 Tools & Gear You’ll Need
- Your wedding dress
- A pair of sharp fabric scissors (for potential minor adjustments or if your seamstress didn’t pre-cut ties)
- A ruler or measuring tape (to ensure even tie placement)
- A well-lit space for practice
- Your designated bustle assistant (a bridesmaid, maid of honor, or trusted family member)
- Patience and a sense of humor!
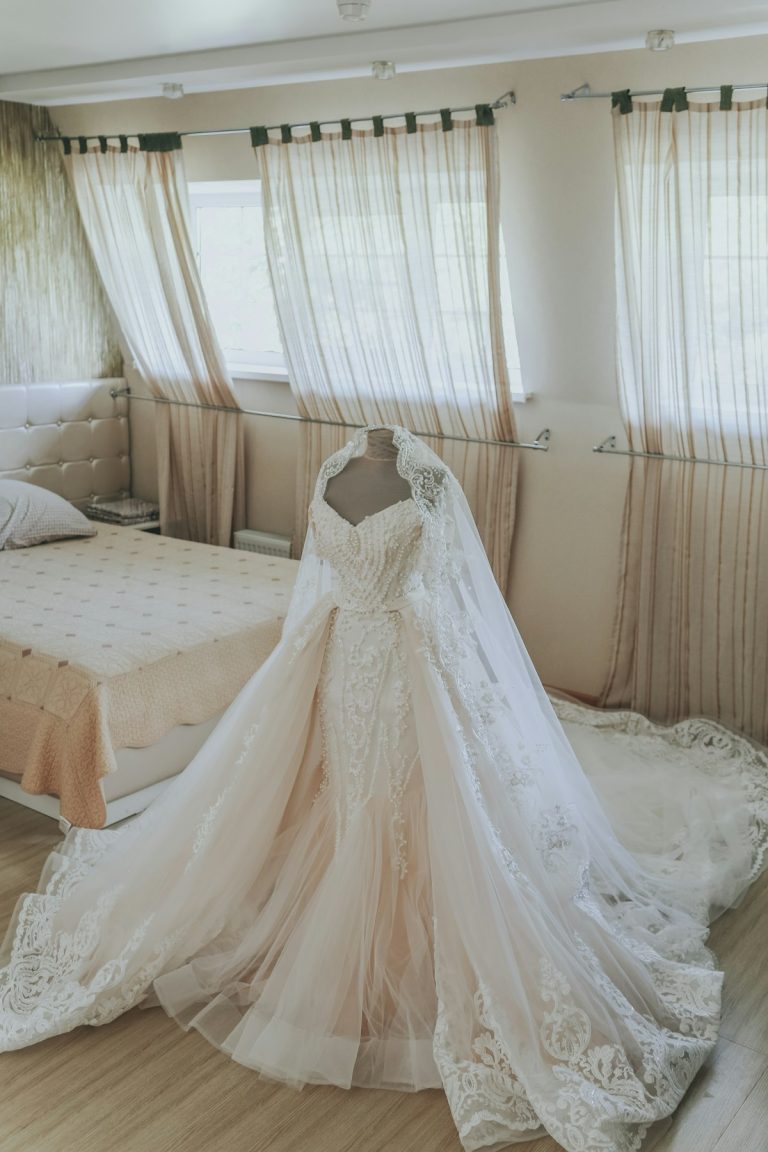
Your wedding dress, a masterpiece of fabric and design, often features a magnificent train meant to impress as you walk down the aisle. However, this same elegance can become a tripping hazard and an impediment to dancing and mingling once the ceremony concludes. This is where the bustle comes in – a crucial, yet often overlooked, element of your bridal ensemble. Learning how to properly bustle your train, particularly with the two most common tie systems—French (or French-style) and American—is essential for a seamless transition from ceremony to reception. This guide will walk you through understanding, preparing for, and executing the bustle, ensuring you can move freely and confidently throughout your celebration.
Understanding Bustle Styles: French vs. American Ties Explained
The primary function of any bustle is to lift and secure the excess fabric of your wedding dress train, transforming it from a flowing statement piece into a manageable, elegant drape for the remainder of your event. The method by which this is achieved largely defines the bustle style. While countless variations exist, most fall under or are inspired by two fundamental approaches: the French bustle and the American bustle.
The Elegance of the French Bustle: Features and Aesthetics
The French bustle, sometimes referred to as an “under-bustle,” is renowned for its sophisticated and often invisible integration. Instead of hooks or buttons on the exterior, it relies on a series of small, discreet loops sewn to the inside of the dress and corresponding ribbons or ties on the train itself. When these ties are gathered and secured through the loops, the train is pulled up and tucked underneath the dress, creating a beautiful, gathered effect that drapes elegantly. This style is particularly favored for dresses with delicate lace or intricate beading, as it minimizes visible hardware on the exterior of the gown. The aesthetic is one of fluidity and natural drapery, with the bustled train appearing almost as if it were part of the original dress design.
The Practicality of the American Bustle: Ease and Functionality
The American bustle, often called a “pick-up” or “over-bustle,” is characterized by its straightforward mechanism, typically involving small hooks sewn onto the exterior of the dress and corresponding loops or buttons on the train. The train is then lifted and hooked or buttoned over the main body of the dress. This method is generally quicker to execute and is easily visible, making it ideal for brides or bridal party members who might be less familiar with intricate garment construction. While the hooks are visible, they are usually small and color-matched to the dress fabric to minimize their prominence. The American bustle offers a clean, somewhat flatter silhouette compared to the gathered look of a French bustle.
Pre-Wedding Preparations: Ensuring a Flawless Bustle
A successful bustle isn’t just about the day-of execution; it’s rooted in careful preparation. Investing time beforehand will save you stress and potential mishaps on your wedding day. This involves having the right tools, collaborating with your seamstress, and, crucially, practicing.
Essential Tools and Materials for Bustling
While your seamstress will likely have prepared the bustle, having a small kit on hand for the day of can be a lifesaver. For a French bustle, ensure you have any extra ribbon ties or spare thread that might have been provided. For an American bustle, a few safety pins can act as a quick, albeit temporary, fix if a hook comes loose. Scissors are essential for any stray threads or minor emergencies. Sometimes, a small mirror can be helpful for the person assisting you to see the back of the dress clearly.
Working with Your Bridal Seamstress: Customizing Your Bustle
Your seamstress is your most valuable ally in achieving the perfect bustle. During your fittings, discuss your preferences for both aesthetics and functionality. They can advise on the best bustle type for your dress’s silhouette and fabric. For a French bustle, they will sew loops on the inside and attach corresponding ribbons to the train. For an American bustle, they’ll attach hooks to the dress and loops or buttons to the train. It’s crucial to understand their specific system. Don’t hesitate to ask them to label the ties or loops if it aids clarity (e.g., “1”, “2”, “3” or “Left”, “Center”, “Right”). Ensure the ties are long enough to be easily grasped and tied, and that the hooks are strong and securely fastened.
Practice Makes Perfect: Rehearsing the Bustle Before the Big Day
This is arguably the most critical step. Schedule a practice session with the person who will be responsible for bustling your dress – your maid of honor, a bridesmaid, or a family member. Have them bustle you up completely. This allows them to familiarize themselves with the process, identify any tricky spots, and understand how the dress should look when bustled. You, in turn, can get a feel for how the train is being lifted and if it feels comfortable. Practicing also helps gauge the time needed, preventing a last-minute scramble.

Step-by-Step Guide: How to Bustle a Wedding Dress Train with French Ties
The French bustle creates a beautifully draped, gathered effect by tucking the train underneath the dress. It’s elegant and discreet, hiding all the mechanics. The key is to identify the corresponding ties and loops and work methodically.
Identifying Your French Bustle Points
On the inside of your dress, near the hem of the train, you’ll find a series of small loops or eyelets. Correspondingly, on the underside of the train itself, you’ll find ribbons or fabric ties, usually color-coded or numbered by your seamstress. There will typically be one tie for each loop. The number of bustle points can vary significantly, from three to over a dozen, depending on the length and volume of your train.
Securing the First Tie: A Gentle Start
Begin with the tie closest to the center of the train, or the one designated as “1” or “Left/Center” by your seamstress. Take the ribbon tie and gently guide it through its corresponding loop or eyelet on the inside of the dress. Once through, tie a secure knot—usually a double knot—to ensure it holds. Avoid pulling too tightly, which can distort the fabric, but ensure it’s snug enough not to come undone.
Locate Corresponding Tie and Loop
Find the first ribbon tie on the underside of the train and its matching loop or eyelet on the inside of the dress’s waistline.
Thread and Tie
Pass the ribbon through the loop. Tie a secure double knot. Ensure the fabric lies flat without excessive puckering.
Progressing Through the Ties: Creating a Seamless Look
Continue this process systematically, moving from the center outwards, or following the numerical/color sequence. Each tie should be threaded through its corresponding loop and tied securely. As you tie each point, the fabric of the train will begin to gather and lift underneath the dress. Ensure that the fabric is being distributed as evenly as possible to create a balanced and elegant drape. If your dress has multiple layers, make sure you are catching the correct layer of the train fabric for each tie to avoid an uneven lift.
The Final Tuck: Ensuring a Tidy Finish
Once all the ties are secured, take a step back and assess the overall look. The train should now be elegantly lifted and tucked away, creating a beautiful silhouette for dancing and walking. Gently smooth out any major wrinkles or puckering. The goal is for the bustled train to look like a natural extension of the dress, not an afterthought. Any excess ribbon can be tucked discreetly into the dress or trimmed by your seamstress later if necessary.
Step-by-Step Guide: How to Bustle a Wedding Dress Train with American Ties
The American bustle offers a simpler, more visible method of securing your train using hooks and loops. It’s efficient and generally easier for less experienced hands.
Locating the American Bustle Hooks or Buttons
On the exterior of your wedding dress, along the hemline where the train begins, you will see a series of small hooks or buttons. On the underside of the train fabric itself, you will find corresponding loops or buttonholes. These are designed to align precisely when the train needs to be lifted.
Engaging the First Fastening: A Secure Connection
Start with the bustle point closest to the center of the train, or as indicated by your seamstress. Take the loop or buttonhole on the train and hook it securely onto its corresponding hook on the dress. Ensure the hook is fully engaged and the loop is firmly seated. The fabric should lift smoothly without undue strain on the hook or the dress fabric.
Align Hook and Loop/Button
Identify the first hook on the dress and the corresponding loop or button on the train fabric.
Secure Fastening
Catch the loop onto the hook, or secure the button. Ensure it’s firm and lies flat against the dress.
Working Your Way Down: Consistent Placement
Proceed to the next set of hooks and loops, working outwards from the center towards the sides of the train. Ensure each hook and loop pair is securely fastened. Consistent placement is key here; try to hook each point at the same relative position on the train to maintain an even drape. As you fasten each point, the train will be gathered and lifted over the main body of the dress.
The Final Check: A Perfectly Lifted Train
Once all the hooks are fastened, give the entire bustled area a gentle shake and smooth it out. The train should now be securely held up, forming a flattering shape around the back of the dress, and allowing you to move freely. Ensure no loops are dangling loosely and that all hooks are securely fastened. The goal is a clean, secure bustle that looks intentional and doesn’t detract from the dress’s overall design.
Troubleshooting Common Bustle Issues on Your Wedding Day
Even with the best preparation, wedding days can bring unexpected challenges. Knowing how to quickly address common bustle issues can save the day (and your dress).
Dealing with a Loose Tie or Hook
If a tie on a French bustle comes undone, the first step is to try and retie it securely. If the ribbon is damaged or frayed, a safety pin can be used to temporarily secure the loop to the dress fabric. For an American bustle, if a hook loosens, try re-engaging it. If a hook is damaged or has come off entirely, a safety pin is your best friend. Carefully pin the loop of the train directly to the dress fabric, trying to replicate the original position as closely as possible. Ensure the pin is inserted discreetly and securely fastened.
Adjusting a Drooping Train
A drooping train usually indicates that one or more bustle points haven’t been secured tightly enough, or the fabric has shifted. For a French bustle, check all the tied knots; re-tie any that seem loose. For an American bustle, re-check all the hooks and loops. If a specific section is sagging, it might be due to the weight of the fabric. You may need to add an extra “tie-down” point using a safety pin discreetly in that area, or gently redistribute the fabric by re-tying/re-hooking adjacent points more snugly.
Quick Fixes for Tangled Fabric
Sometimes, fabric can get caught or tangled, especially with multi-layered dresses. Gently try to identify where the fabric is caught. If it’s caught on a bustle point, carefully unhook or untie it, free the fabric, and then re-secure the point. If it’s just bunched up, try to smooth it out by hand. Patience is key here; avoid yanking, which can cause damage. In some cases, a bridesmaid with nimble fingers might need to help gently ease the fabric back into place.
Bustle Etiquette and Considerations for Your Wedding Party
The bustle is often a team effort. Clear communication and the right person for the job are essential for a smooth operation.
Assigning Your Bustle Assistant: Who Should Help?
Choose someone who is calm under pressure, has good dexterity, and is familiar with you and your dress. Often, this role falls to the maid of honor or a designated bridesmaid. Ensure this person knows they are responsible and has attended the practice session. It’s also helpful if they are physically able to reach the bustle points easily.
Communicating Instructions Clearly to Your Assistant
During your practice session, make sure your assistant understands the specific system your seamstress used. If there are numbered ties or color-coding, ensure they know the sequence. Discuss any potential tricky spots. Reiterate the importance of a secure tie or hook, and how the dress should look once properly bustled. A quick verbal reminder on the day, perhaps with a glance at your dress’s bustle diagram if your seamstress provided one, can be helpful.
Timing Your Bustle: When to Secure Your Train
The bustle is typically done immediately after the ceremony, before you move into the reception space for photos, cocktail hour, or dinner. This is the opportune moment when the train is no longer needed for its aisle-walking purpose. Your photographer may want to capture some shots of the train before it’s bustled, so coordinate with them. Have your designated assistant ready to go, perhaps even waiting discreetly nearby as the ceremony concludes.
Beyond the Bustle: Maintaining Your Dress Throughout the Celebration
Once your train is securely bustled, you can enjoy the rest of your day with greater freedom. However, a few considerations can help maintain the dress’s appearance and integrity.
Navigating Crowds with a Bustled Train
Even when bustled, a train adds volume to the back of your dress. Be mindful when moving through crowded spaces, such as navigating guest tables or busy hallways. Keep your elbows slightly out and be aware of your surroundings to avoid snagging the fabric on chairs, bags, or other guests. Gentle awareness is usually all that’s needed.
Dancing the Night Away: Ensuring Your Bustle Holds
This is where a well-executed bustle truly shines! Whether you’re doing a gentle sway or a full-on dance-off, your bustled train should allow for ample movement. If you anticipate particularly energetic dancing, have your assistant do a final quick check of the bustle points periodically throughout the evening, perhaps during a break in dancing or while you’re freshening up.
Real-World Scenarios: Bustling for Different Dress Silhouettes
The effectiveness and appearance of a bustle can vary significantly depending on your dress’s silhouette and train type.
Bustling Strategies for Ballgowns
Ballgowns often have very full, voluminous trains. For these, a French bustle can create a stunning, gathered effect that complements the skirt’s volume. An American bustle can also work, but it might create a more pronounced “pouf” at the back. The key is ensuring enough bustle points are used to distribute the weight evenly and prevent sagging. Multiple tie-downs are essential.
Bustling Tips for A-Line and Mermaid Dresses
A-line and mermaid dresses typically have less voluminous trains than ballgowns. For these silhouettes, both French and American bustles can work beautifully. An American bustle might offer a cleaner, more streamlined look, while a French bustle can add a touch of romantic draping. The focus here is often on ensuring the bustle lies flat against the dress’s structure without adding unnecessary bulk.
Considerations for Dresses with Extensive or Detachable Trains
Extremely long or cathedral-length trains, or those made of heavy fabrics like satin or brocade, require a robust bustle system. You might need more bustle points than usual, and stronger ties or hooks are paramount. For detachable trains, the bustle mechanism might be integrated into the attachment point, or you might need a separate bustle for the dress itself once the train is removed. Always consult with your seamstress for these more complex designs.
Mastering the bustle is a vital skill for any bride aiming for comfort and elegance on her wedding day. By understanding the differences between French and American styles, preparing diligently, practicing thoroughly, and knowing how to troubleshoot, you can ensure your magnificent train transforms seamlessly from ceremony showstopper to reception-ready sophistication. Enjoy every moment!